
I ended up making a skirt that was a cross between the Ooobop! floral mini (tutorial here) and Nette's Go Parisienne skirt.

(Left: floral mini. Right: Go Parisienne skirt)
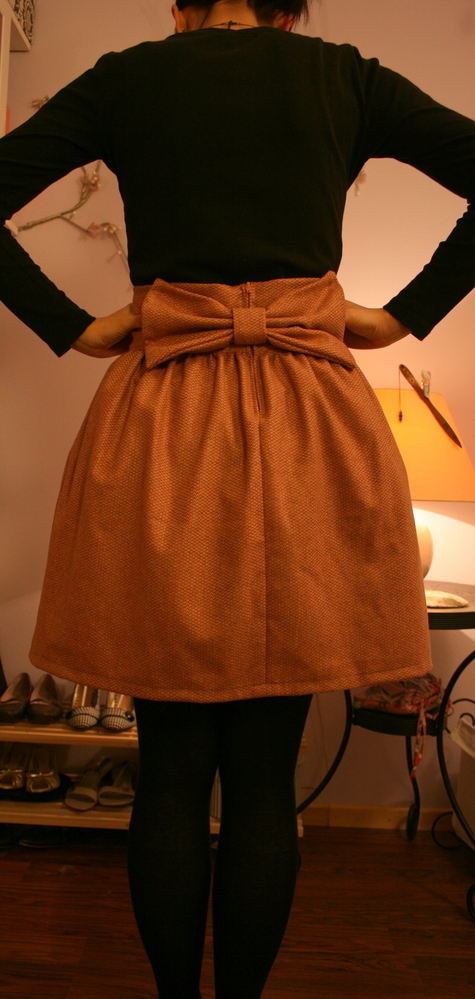
Sashes on skirts annoy me because they dig into my back and I can never make them sit right (so I suspect user error rather than a fault with the sash itself!), so I used the floral mini tutorial for the main skirt and then the bow that Nette used at the back of hers to add something special to the back.


I made this skirt a bit longer than was suggested in the original (40cm from the bottom of the waistband to the hem, instead of 32cm) so I can wear it to work, and also made the waistband a bit wider - mine was 13cm when I cut it, so the actual band on the finished skirt is 5cm wide instead of 3cm finished width as suggested. The waistband circumference was 72cm, and I have decided that next time I make this I'll make it sit on my waist instead of somewhere between my waist and hips! I also didn't use interfacing in the waistband because of the stiffer fabric I used as an under layer.
To make the pleats, I marked every 2 inches along the top and made a box pleat in the centre front (or two knife pleats butted up against each other facing different ways, if you like!) and then knife pleats all the way around. It sounds very bizarre when I'm explaining it, but it worked!
I had a lot of dramas installing an invisible zipper in this skirt- here is my first attempt at it.

Even though I was positive I was doing it properly, and used the foot correctly and everything, it's not very invisible at all!
Two more tries and three broken needles later, I gave up and just installed it like a regular zipper. I'm not sure what the technique is called, but you end up with two little flaps covering the zipper teeth - it's the method that they use in all of the Butterick patterns.
The side seams on the tulip fabric and the cotton are French seamed, and the centre back seam is done with a technique that I made up myself (because I was stuck, haha) - basically a baby hem at the seam allowances, and then treated the new edge as the raw edge when I was sewing it together. So I now have another item of clothing to add to my 'no raw edges' collection - a slight obsession of mine at the moment!
Unfortunately I don't have any photos of it on me, I'm waiting for my sister's good camera be able to talk to the computer again so I can coerce her into taking some for me!
So here are a couple of photos of it on my oddly-shaped dressmaker's dummy, a little crumpled from being squished in my wardrobe, but still beautiful!


Be patient. Learning how to sew a dress is not an overnight thing. It is a long process. But by regularly practicing this craft, you will be able to master sewing in no time. Start with simple projects such as pillow cases and table runners. These simple projects also require pattern making, sewing with a machine, and sewing straight lines. This will train you how to sew a dress eventually.
ReplyDeleteThanks for the support :) I think I've got the basics down, I just get stuck on little things like the zips. And in hindsight, I think I didn't press the coils properly, because I have since done one with a very savagely pressed zipper and it worked perfectly!
ReplyDeletethis is cuuuute!
ReplyDelete