When I was messing around on Pinterest, I found this tutorial for making your own labels to go inside your handmade clothes. And I would really like to give it a go!
My only problem is, I'm not very good at making decisions, so I'm turning to my readers for some input - which one of the following do you prefer? They would be printed onto iron on t-shirt transfer paper, and attached to grosgrain ribbon, probably white or cream.
I think at this stage, I prefer the first loveheart, although the bird and the moustache are also serious contenders! Unless I make up 3 sets...
I'll end this self-indulgent post with some news - I have finished my strawberry dress, and I'll be showcasing it on my blog during Debi's second Sew Grateful week, the 6th to 12th of February. All that I need to do now is wait for a non-rainy day (at this time of the year, a Nice Day is a bit too much to ask for - even if there is no rain, there'll still be very high humidity) so that my sister can help me take some photos!
Sunday, 29 January 2012
Sunday, 1 January 2012
Fabric rolls and sewing plans
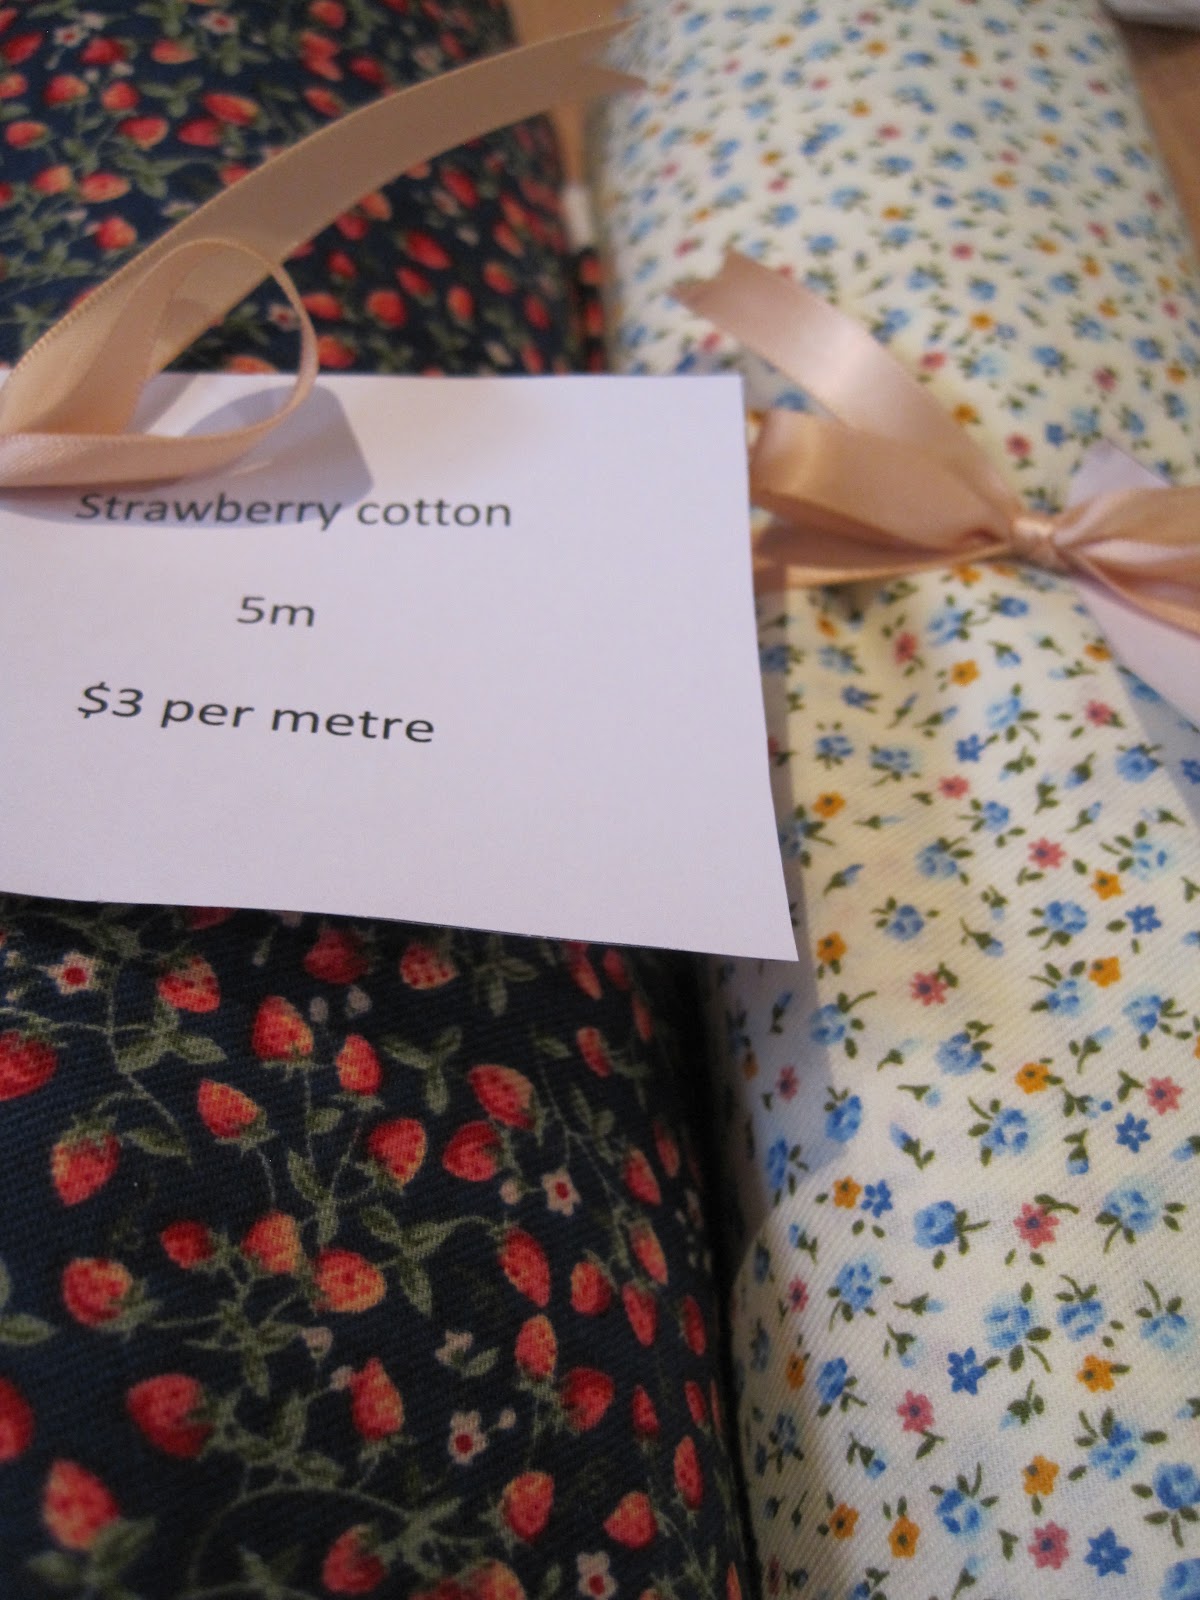
Look at my happy fabric, all rolled, labelled, and tied with a bow!
My copy of the Collette Patterns Sewing Handbook came yesterday, and this was one of the tips she included in it. This fabric was previously sitting in a bag, folded and flat, and slipping everywhere while unfolding itself. Now it's all bundled up, sits still, and I know how much I have of the fabric!
Plus, it's super pretty with the gold bows with notched ends!
The strawberry printed cotton in the left of this photo is destined to be view A with short sleeves of this StylePrint dress pattern that I won in a giveaway from Debi. I've also got a beltmaking kit on the way from A Fashionable Stitch, so I'm going to do bright red buttons and a red belt to go with this dress.
I haven't quite worked out what I'm going to do with the daisy printed fabric yet - it's cream, with blue, pink, and yellow flowers on it. Any suggestions would be welcome. My last thoughts were a pajama set with mid-thigh length shorts and a top with a shirred back - one of the techniques I've been wanting to try out. But I already have too many pjs, so maybe not. So this may be one that sits there for a little while and waits for inspiration to strike, unless you have any suggestions? I have 3m of it, so there's a fair bit there!
These two beautiful satins are for my choir dress. The peacock coloured one didn't photograph very well, it is actually a whole lot more green than this. In any case, the rolling was DEFINITELY a good idea for these two, the main culprits of the slipping and sliding around!
I'm hoping to get this stitched up by the end of January (which may or may not end up happening!), and I'll be cutting it out as soon as I get back from my trip. I'm excited to start on the good version of this dress, I really hope it turns out!
In any case, that's what I have planned for the next little while. Before I go back to uni, I also want to try out a shorts pattern and try sewing with jersey/knits - two things that I have never done before. I have the patterns already, but I'm not going to buy the material until AFTER my current projects are finished, otherwise none of them will get done!
Saturday, 31 December 2011
Tulip skirt part 1
When I was getting fabric for an unrelated project, I was called to the most beautiful fabric that I have ever seen - a cotton voile with blue and purple tulips. So, because I have no self control, I bought some, along with some plain white cotton for underlining/lining (what do you call it when the lining fabric is included in the pleats at the top with the main fabric, but is hanging free for the rest of the skirt?)
It was a very wide piece (not quite 150cm, but nearly!), and I got 1.5 m of the fabric
I ended up making a skirt that was a cross between the Ooobop! floral mini (tutorial here) and Nette's Go Parisienne skirt.
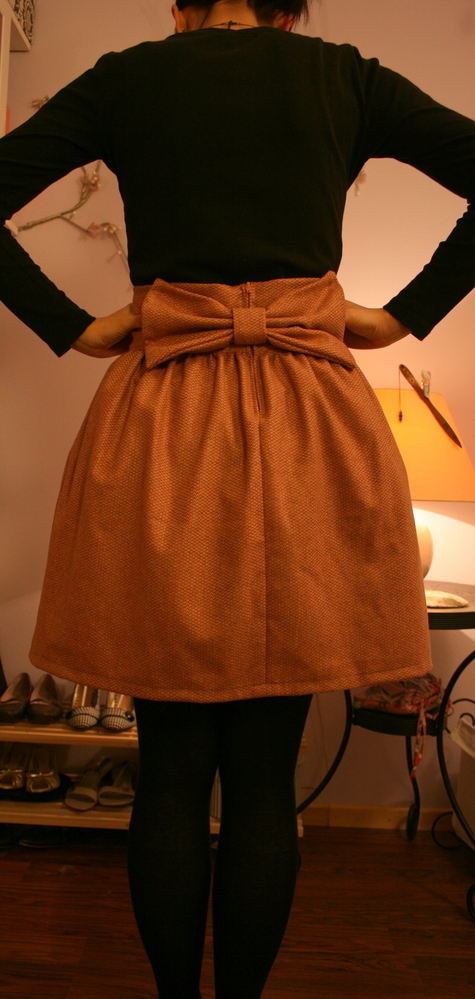
Sashes on skirts annoy me because they dig into my back and I can never make them sit right (so I suspect user error rather than a fault with the sash itself!), so I used the floral mini tutorial for the main skirt and then the bow that Nette used at the back of hers to add something special to the back.
I made this skirt a bit longer than was suggested in the original (40cm from the bottom of the waistband to the hem, instead of 32cm) so I can wear it to work, and also made the waistband a bit wider - mine was 13cm when I cut it, so the actual band on the finished skirt is 5cm wide instead of 3cm finished width as suggested. The waistband circumference was 72cm, and I have decided that next time I make this I'll make it sit on my waist instead of somewhere between my waist and hips! I also didn't use interfacing in the waistband because of the stiffer fabric I used as an under layer.
To make the pleats, I marked every 2 inches along the top and made a box pleat in the centre front (or two knife pleats butted up against each other facing different ways, if you like!) and then knife pleats all the way around. It sounds very bizarre when I'm explaining it, but it worked!
I had a lot of dramas installing an invisible zipper in this skirt- here is my first attempt at it.
Even though I was positive I was doing it properly, and used the foot correctly and everything, it's not very invisible at all!
Two more tries and three broken needles later, I gave up and just installed it like a regular zipper. I'm not sure what the technique is called, but you end up with two little flaps covering the zipper teeth - it's the method that they use in all of the Butterick patterns.
The side seams on the tulip fabric and the cotton are French seamed, and the centre back seam is done with a technique that I made up myself (because I was stuck, haha) - basically a baby hem at the seam allowances, and then treated the new edge as the raw edge when I was sewing it together. So I now have another item of clothing to add to my 'no raw edges' collection - a slight obsession of mine at the moment!
Unfortunately I don't have any photos of it on me, I'm waiting for my sister's good camera be able to talk to the computer again so I can coerce her into taking some for me!
So here are a couple of photos of it on my oddly-shaped dressmaker's dummy, a little crumpled from being squished in my wardrobe, but still beautiful!
It was a very wide piece (not quite 150cm, but nearly!), and I got 1.5 m of the fabric
I ended up making a skirt that was a cross between the Ooobop! floral mini (tutorial here) and Nette's Go Parisienne skirt.
(Left: floral mini. Right: Go Parisienne skirt)
Sashes on skirts annoy me because they dig into my back and I can never make them sit right (so I suspect user error rather than a fault with the sash itself!), so I used the floral mini tutorial for the main skirt and then the bow that Nette used at the back of hers to add something special to the back.
I made this skirt a bit longer than was suggested in the original (40cm from the bottom of the waistband to the hem, instead of 32cm) so I can wear it to work, and also made the waistband a bit wider - mine was 13cm when I cut it, so the actual band on the finished skirt is 5cm wide instead of 3cm finished width as suggested. The waistband circumference was 72cm, and I have decided that next time I make this I'll make it sit on my waist instead of somewhere between my waist and hips! I also didn't use interfacing in the waistband because of the stiffer fabric I used as an under layer.
To make the pleats, I marked every 2 inches along the top and made a box pleat in the centre front (or two knife pleats butted up against each other facing different ways, if you like!) and then knife pleats all the way around. It sounds very bizarre when I'm explaining it, but it worked!
I had a lot of dramas installing an invisible zipper in this skirt- here is my first attempt at it.
Even though I was positive I was doing it properly, and used the foot correctly and everything, it's not very invisible at all!
Two more tries and three broken needles later, I gave up and just installed it like a regular zipper. I'm not sure what the technique is called, but you end up with two little flaps covering the zipper teeth - it's the method that they use in all of the Butterick patterns.
The side seams on the tulip fabric and the cotton are French seamed, and the centre back seam is done with a technique that I made up myself (because I was stuck, haha) - basically a baby hem at the seam allowances, and then treated the new edge as the raw edge when I was sewing it together. So I now have another item of clothing to add to my 'no raw edges' collection - a slight obsession of mine at the moment!
Unfortunately I don't have any photos of it on me, I'm waiting for my sister's good camera be able to talk to the computer again so I can coerce her into taking some for me!
So here are a couple of photos of it on my oddly-shaped dressmaker's dummy, a little crumpled from being squished in my wardrobe, but still beautiful!
Sunday, 11 December 2011
Bodice draft 2
Disclaimer: this post contains a goofy half-smile, black bra underneath cream fabric, and black strapping tape - if you are shocked by any of the above silly looks, please stay away! Haha.
Here we go - I'm much much happier with the fit of this one. I raised the neckline 1.5 inches, lowered the point of the bust darts by about 1.25 inches, adjusted the bust darts so that instead of straight legs they have bent legs (like in this tutorial by Gertie at Gertie's New Blog for Better Sewing), let out 0.5 cm from either side of the bust darts... and I think that's about it! The darts weren't done in the highly mathematical way as described in the tutorial - I tried doing it like that and still couldn't get it quite right, so I just pinched off the fabric into a good shape for my body and it turned into that shape so I went with it!
The end of the darts looks not quite right in this picture but I've since pressed and re-pressed and re-re-pressed them, and it's finally sitting properly.
In regard to my gapey back problem, I took about 1.5cm (I think?) off either side of the centre back seam, tapering down to the original seam allowance just above where the waist darts end, and I think that's just about fixed the problem without completely restricting my movement.
Here we go - I'm much much happier with the fit of this one. I raised the neckline 1.5 inches, lowered the point of the bust darts by about 1.25 inches, adjusted the bust darts so that instead of straight legs they have bent legs (like in this tutorial by Gertie at Gertie's New Blog for Better Sewing), let out 0.5 cm from either side of the bust darts... and I think that's about it! The darts weren't done in the highly mathematical way as described in the tutorial - I tried doing it like that and still couldn't get it quite right, so I just pinched off the fabric into a good shape for my body and it turned into that shape so I went with it!
The end of the darts looks not quite right in this picture but I've since pressed and re-pressed and re-re-pressed them, and it's finally sitting properly.
In regard to my gapey back problem, I took about 1.5cm (I think?) off either side of the centre back seam, tapering down to the original seam allowance just above where the waist darts end, and I think that's just about fixed the problem without completely restricting my movement.
In other exciting news, I have acquired the fabric - it's a satin charmeuse, from Spotlight, and it's lovely! Plus, it was on sale for about $6.50 a metre instead of $12.99, which is brilliant considering how much I need - 4m of black and 4m of teal/peacock. Hopefully I've done all my calculations correctly and I don't need to go back and get more!
As before, any input on the fit of the bodice would be much appreciated, before I cut into my main fabric, hopefully sometime this week.
Sunday, 4 December 2011
Choir necklaces
These darling little necklaces are one of my recent crafting activities. I made at least 20 of these for the directors of my choir and the group of choirs that I'm in, our accompanist, and the members of my choir. Of course, they are in my choir colours of teal(ish), white, and black.
I made them following this magnificent tutorial that I found on Pinterest. I used 22 gauge silver-coated wire instead of the recommended 24 gauge (because I couldn't find any) and it worked perfectly fine - the only small problem was that my fingers were sort of sore afterwards! Of course, I also used round-nosed pliers and the ones with the bent head - I don't know what the name of that one is! I just call it the bendy one, but I know that's not what it's supposed to be called.
They have a small jump ring attached to the top, so that they can be put onto a necklace as a pendant, or a bracelet as a charm, depending on what the wearer feels like.
Here they are, all wrapped up in their teal(ish) bags, ready to be given out!
We also have 3 guys in the choir, and they wanted some too, so I found some tiny safety pins in mum's sewing box, and wrapped the wire on the back around the pins so now they can be worn on the shirt or tie, or wherever! I didn't get any photos of the back of them, but here they are attached to my dress, when I was taking them for a test run - or just playing around, either way!
BONUS PICTURE: my pendant on a silver chain - hopefully this will give a little idea of the scale :) (and my button that's coming undone, which I didn't realise until just now!)
Update on the What I Wore series
So, my first brilliant idea for the blog, documenting what I wear each day, has fallen through. It's week 4 of my challenge, and I'm finding it really really hard to take photos of my outfits each day. I find myself getting to 10pm, going to have a shower, and realising that I still haven't taken the daily photo and the lighting is going to be bad, and this week I just haven't been bothered.
So.
Is this something that you enjoy seeing? I'm tossing up whether I should suck it up, write off week 4, and just keep on going, or if I should just abandon it.
Of course, I'll still be trying to keep to my Made by Me Mondays, and all of the other goals, I just wouldn't be showing you everything every day.
Any input is very very welcome!
So.
Is this something that you enjoy seeing? I'm tossing up whether I should suck it up, write off week 4, and just keep on going, or if I should just abandon it.
Of course, I'll still be trying to keep to my Made by Me Mondays, and all of the other goals, I just wouldn't be showing you everything every day.
Any input is very very welcome!
Tuesday, 29 November 2011
What I Wore week 3
Away we go with week 3!
I have to admit, I had a slip-up this week - I didn't get a chance to take a photo of what I wore on Friday! I was at work all day, home for about half an hour, then off to a choir concert, so I ended up wearing 3 different outfits.
For this Made by Me Monday, I wore my elephant dress - the first dress I made. I'll be blogging about that dress properly when I can line up my sister to take photos for me.
Tuesday's dress has a really interesting lattice detail at the front, and a cutout at the back - here's a picture of the back. These little details really make the dress something special, and I'd love to incorporate something like this into my own sewing.
On Wednesday, I had fun taking a swirly photo with my skirt - I love this skirt so much! I bought it off Modcloth (it's called the "Let's Talk Lace" skirt, but it's no longer on the site so I can't attach a link), but it was lined in regular, slightly see-through cotton lining fabric. This would be alright in a normal skirt, but when you have lace + see-through lining you end up with a very very unwearable skirt. So I got some beige poplin from Spotlight and drafted a new lining, so now I can wear the skirt without being paranoid that everybody can see absolutely everything underneath. My new lining is French seamed and falls about half an inch shorter than the original lining, so it adds some body to the skirt but isn't visible from the outside.
(Action shots of spinning are very attractive - NOT! But this is a small peek into how much fun I had wearing this skirt - love it!)
My physio gave me black strapping tape this time (instead of skin-coloured) for some reason, so I thought I'd show it off - because it's such a good look! But seriously, this stuff is magical. I was getting really bad headaches and neck cramps, but the physio released all the muscle spasms, gave me exercises, and taped my shoulders, and I haven't had any problems!
On Thursday, you may notice my necklace - I made a matching set of necklaces for the girls and pins for the guys in my choir, in choir colours. I'll add some better pictures later on in the week, and a link to the tutorial I used to make these gorgeous little things.
It's starting to heat up a lot here in the North, so I'm loving my shorts and dresses - though I didn't realise that I wore quite so many skirts and dresses this week until I put together this photoset!
I have to admit, I had a slip-up this week - I didn't get a chance to take a photo of what I wore on Friday! I was at work all day, home for about half an hour, then off to a choir concert, so I ended up wearing 3 different outfits.
For this Made by Me Monday, I wore my elephant dress - the first dress I made. I'll be blogging about that dress properly when I can line up my sister to take photos for me.
Tuesday's dress has a really interesting lattice detail at the front, and a cutout at the back - here's a picture of the back. These little details really make the dress something special, and I'd love to incorporate something like this into my own sewing.
On Wednesday, I had fun taking a swirly photo with my skirt - I love this skirt so much! I bought it off Modcloth (it's called the "Let's Talk Lace" skirt, but it's no longer on the site so I can't attach a link), but it was lined in regular, slightly see-through cotton lining fabric. This would be alright in a normal skirt, but when you have lace + see-through lining you end up with a very very unwearable skirt. So I got some beige poplin from Spotlight and drafted a new lining, so now I can wear the skirt without being paranoid that everybody can see absolutely everything underneath. My new lining is French seamed and falls about half an inch shorter than the original lining, so it adds some body to the skirt but isn't visible from the outside.
(Action shots of spinning are very attractive - NOT! But this is a small peek into how much fun I had wearing this skirt - love it!)
My physio gave me black strapping tape this time (instead of skin-coloured) for some reason, so I thought I'd show it off - because it's such a good look! But seriously, this stuff is magical. I was getting really bad headaches and neck cramps, but the physio released all the muscle spasms, gave me exercises, and taped my shoulders, and I haven't had any problems!
On Thursday, you may notice my necklace - I made a matching set of necklaces for the girls and pins for the guys in my choir, in choir colours. I'll add some better pictures later on in the week, and a link to the tutorial I used to make these gorgeous little things.
It's starting to heat up a lot here in the North, so I'm loving my shorts and dresses - though I didn't realise that I wore quite so many skirts and dresses this week until I put together this photoset!
Subscribe to:
Posts (Atom)